Implementing Sign in with Apple in a client-server setup is valuable because it addresses a real-world need that many developers face, especially as Apple requires apps offering third-party login to support it. While Apple's documentation focuses mainly on the iOS side, there’s often a gap in clear explanations for securely validating Apple ID tokens on the backend — a critical step to prevent security vulnerabilities.
Since Node.js is a widely used backend for mobile apps, providing a practical, end-to-end guide would help a large audience, fill a common knowledge gap, and position you as an expert who understands both mobile and server-side development, making the post highly useful, shareable, and relevant.
Apple Sign in
Apple Sign In is a secure authentication service introduced by Apple in 2019, allowing users to log in to apps and websites using their Apple ID. It emphasizes privacy by minimizing data sharing with third parties, offering features like hiding the user’s real email address through a unique, auto-generated proxy email. Available on iOS, macOS, and web platforms, it provides a fast and convenient alternative to traditional social logins like Google or Facebook.
Advantages of Apple Sign In
One of the biggest advantages is enhanced privacy—Apple does not track user activity across apps, and the “Hide My Email” feature protects users from spam and data leaks. It also simplifies the login process with Face ID, Touch ID, or device passcodes, reducing password fatigue. Additionally, Apple Sign In is mandatory for apps that offer third-party logins on iOS, ensuring wider adoption and consistent security standards.
Inconveniences of Apple Sign In
A major drawback is its limited availability, as it only works on Apple devices, excluding Android and Windows users. Some developers also criticize Apple for forcing its use on iOS apps while restricting competitor login options. Additionally, if a user loses access to their Apple ID, account recovery can be difficult, potentially locking them out of linked services. Despite these issues, Apple Sign In remains a strong choice for privacy-focused users.
Dockerized Node.JS server side
Start by setting up a blank Node.js server using Express.js to handle HTTP requests.
npm init -y 
Server.js code is following:
const express = require('express');
const jwt = require('jsonwebtoken');
const jwksClient = require('jwks-rsa');
require('dotenv').config();

const app = express();
const PORT = process.env.PORT || 3000;

// Middleware for parsing JSON
app.use(express.json());

// Client for look up public keys at Apple
const client = jwksClient({
    jwksUri: 'https://appleid.apple.com/auth/keys'
});

// Function for getting public key
function getAppleKey(header, callback) {
    client.getSigningKey(header.kid, function (err, key) {
        if (err) {
            callback(err);
        } else {
            const signingKey = key.getPublicKey();
            callback(null, signingKey);
        }
    });
}

// Route for authenticate
app.post('/auth/apple', (req, res) => {
    const { identityToken } = req.body;

    if (!identityToken) {
        return res.status(400).json({ error: 'identityToken missing' });
    }

    jwt.verify(identityToken, getAppleKey, {
        algorithms: ['RS256']
    }, (err, decoded) => {
        if (err) {
            console.error('Error verifying token:', err);
            return res.status(401).json({ error: 'Invalid token' });
        }

        // decoded contains user data
        console.log('Token verified:', decoded);

        res.json({
            success: true,
            user: {
                id: decoded.sub,
                email: decoded.email,
                email_verified: decoded.email_verified
            }
        });
    });
});

app.listen(PORT, () => {
    console.log(`Server listening on port ${PORT}`);
});
server.js sets up an Express server that listens for authentication requests using Apple’s Sign-In service. It imports necessary modules like express for routing, jsonwebtoken for verifying JSON Web Tokens (JWTs), and jwks-rsa for retrieving Apple’s public keys used to validate tokens. The server is configured to parse incoming JSON payloads and uses environment variables (loaded via dotenv) to optionally define a custom port.
The core logic resides in the /auth/apple POST route. When a client sends a request to this endpoint with an identityToken in the body (typically issued by Apple after a successful login), the server first checks if the token is present. It then verifies the token using jsonwebtoken.verify(), passing a custom key retrieval function (getAppleKey). This function uses the jwksClient to fetch the appropriate public key from Apple’s JWKS (JSON Web Key Set) endpoint based on the kid (Key ID) found in the token header.
If the token is valid, the decoded payload—which includes user-specific data like sub (user ID), email, and email_verified—is extracted and returned in the response as JSON. If token verification fails, an error response with HTTP 401 status is sent. This setup allows backend applications to securely validate Apple identity tokens without hardcoding public keys, keeping the authentication mechanism both dynamic and secure.
Server is dockerized:
FROM node:20
WORKDIR /usr/src/app
COPY package*.json ./
RUN npm install
COPY . .
EXPOSE 3000
CMD ["npm", "start"]
This Dockerfile sets up a Node.js environment using the node:20 base image, creates a working directory at /usr/src/app, copies package.json and package-lock.json (if present) into it, installs dependencies with npm install, copies the rest of the application files, exposes port 3000 for the container, and finally runs the npm start command to launch the application.
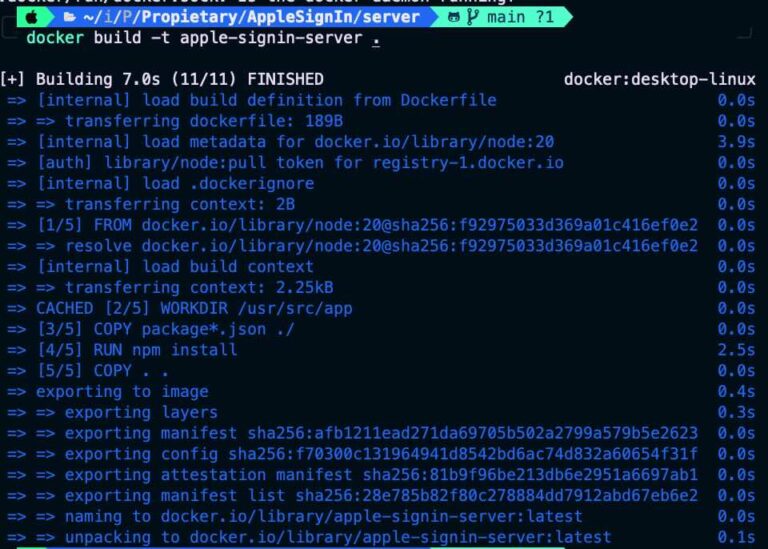
For building the app just type:
docker build -t apple-signin-server .
Finally execute the container:
docker run -p 3000:3000 apple-signin-server 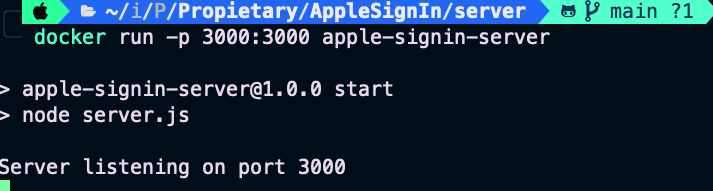
Server ready for receiving requests…
Client iOS Apple Sign in app
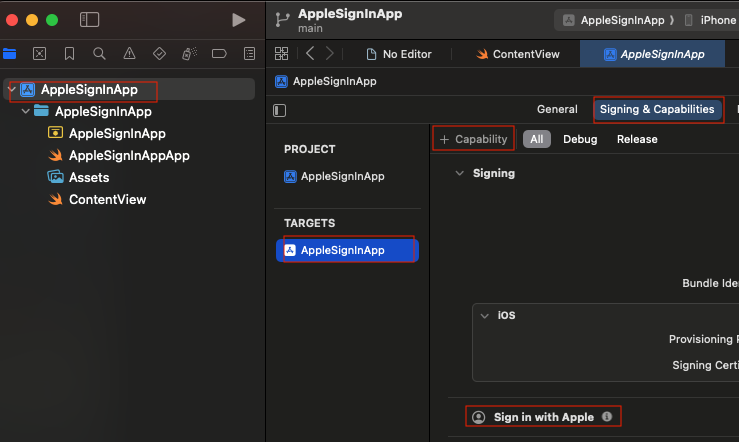
After creating a simple iOS app project, go to the target settings and add the ‘Sign in with Apple’ capability. Then, start by creating a blank Node.js server.
The next step is the client code itself:
import SwiftUI
import AuthenticationServices

struct ContentView: View {
    @State private var userID: String?
    @State private var userEmail: String?
    @State private var userName: String?

    var body: some View {
        VStack(spacing: 20) {
            if let userID = userID {
                Text("Welcome 🎉")
                    .font(.title)
                Text("User ID: \(userID)")
                if let name = userName {
                    Text("Name: \(name)")
                }
                if let email = userEmail {
                    Text("Email: \(email)")
                }
            } else {
                SignInWithAppleButton(
                    .signIn,
                    onRequest: { request in
                        request.requestedScopes = [.fullName, .email]
                    },
                    onCompletion: { result in
                        switch result {
                        case .success(let authorization):
                            handleAuthorization(authorization)
                        case .failure(let error):
                            print("Authentication error: \(error.localizedDescription)")
                        }
                    }
                )
                .signInWithAppleButtonStyle(.black)
                .frame(width: 280, height: 50)
                .cornerRadius(8)
                .padding()
            }
        }
        .padding()
    }

    private func handleAuthorization(_ authorization: ASAuthorization) {
        if let appleIDCredential = authorization.credential as? ASAuthorizationAppleIDCredential {
            userID = appleIDCredential.user
            userEmail = appleIDCredential.email
            if let fullName = appleIDCredential.fullName {
                userName = [fullName.givenName, fullName.familyName]
                    .compactMap { $0 }
                    .joined(separator: " ")
            }

            if let identityToken = appleIDCredential.identityToken,
               let tokenString = String(data: identityToken, encoding: .utf8) {
                authenticateWithServer(identityToken: tokenString)
            }
        }
    }

    private func authenticateWithServer(identityToken: String) {
        guard let url = URL(string: "http://localhost:3000/auth/apple") else { return }

        var request = URLRequest(url: url)
        request.httpMethod = "POST"
        request.addValue("application/json", forHTTPHeaderField: "Content-Type")

        let body = ["identityToken": identityToken]

        request.httpBody = try? JSONSerialization.data(withJSONObject: body, options: [])

        URLSession.shared.dataTask(with: request) { data, response, error in
            if let data = data,
               let json = try? JSONSerialization.jsonObject(with: data) {
                print("Server response:", json)
            } else {
                print("Error communicating with server:", error?.localizedDescription ?? "Unknown error")
            }
        }.resume()
    }
}


#Preview {
    ContentView()
}
It defines a user interface for an iOS app that integrates Sign in with Apple. The core logic is built into the ContentView struct, which maintains state variables to store the signed-in user’s ID, name, and email. When the view is rendered, it checks whether the user is already signed in (i.e., if userID is not nil). If the user is authenticated, it displays a welcome message along with the retrieved user details. If not, it shows a “Sign in with Apple” button that initiates the authentication process when tapped.
When the “Sign in with Apple” button is pressed, it triggers a request for the user’s full name and email. The result of this action is handled in the onCompletion closure. If the sign-in is successful, the handleAuthorization method is called. This function extracts the user’s credentials from the ASAuthorizationAppleIDCredential object, including their user ID, email, and full name (if provided). It also extracts the identity token (a JSON Web Token), which is used to authenticate the user on the app’s backend server.
The authenticateWithServer function handles the server-side communication. It sends a POST request to http://localhost:3000/auth/apple, passing the identityToken in the JSON body. This token can be verified on the backend to ensure the identity is legitimate and secure. The response from the server (or any error encountered) is printed to the console. This architecture supports secure, privacy-preserving user login using Apple’s authentication services, commonly used in modern iOS apps.
Apple Sign in integration
Deploy iOS app with Apple Sign-In in a simulator (not on a real device).

Simply sign in using your personal iCloud credentials. Once Apple Sign-In is successful on the client side, it sends a request and provides the identityToken.
Even if you uninstall the app from the device, the identityToken remains unchanged. Therefore, it can reliably be used as a user identifier.
Conclusions
From a programming perspective, implementing Apple Sign-In in your apps is straightforward and enhances privacy, as users can choose whether to share their email.
You can find source code used for writing this post in following repository.
References
- Sign in with Apple
Apple Developer Documentation